This library adheres to Pragmatic Versioning to communicate the backwards compatibility of each version.
The latest releases are available in
Result supports both Maven and Gradle for seamless integration into your Java build workflow.
Artifact Coordinates
Add this Maven dependency to your build:
Group ID
Artifact ID
Latest Version
Add Result as a Maven dependency to your project.
Add Result as a Gradle dependency to your project.
We learned how to add the library to your project using either Maven or Gradle. By including the correct dependencies, you're now ready to start leveraging the power of Results in your applications.
Apache Maven is a convention-based Java build tool that uses XML configuration to manage dependencies, compile code, and package applications in a standardized lifecycle.
Gradle is a flexible and high-performance build tool that uses a Groovy or Kotlin DSL to define builds, offering advanced customization and fast incremental builds.
Maven Central provides snippets for different build tools to declare this dependency.
Maven
Gradle
This is the most common configuration for projects using Result internally. If we were building a library that exposed Result in its public API, we should use api instead of implementation.
Conclusion
Getting Started
How to get up and running with Results in no time
The best way to think of Results is as a super-powered version of Java's Optionals.
Result builds upon the familiar concept of Optional, enhancing it with the ability to represent both success and failure states.
No need to return null or throw an exception: just return a failed result.
Optional class is useful for representing values that might be present or absent, eliminating the need for null checks. However, Optionals fall short when it comes to error handling because they do not convey why a value is lacking. Result addresses this limitation by encapsulating both successful values and failure reasons, offering a more expressive way to reason about what went wrong.
Results provide the same methods as Optionals, plus additional ones to handle failure states effectively.
By leveraging Results, you can unleash a powerful tool for error handling that goes beyond the capabilities of traditional Optionals, leading to more robust and maintainable Java code.
In Java, methods that can fail typically do so by throwing exceptions. Then, exception-throwing methods are called from inside a try block to handle errors in a separate catch block.
This approach is lengthy, and that's not the only problem — it's also very slow.
Let's now look at how the above code could be refactored if connect() returned a Result object instead of throwing an exception.
In the example above, we used only 4 lines of code to replace the 10 that worked for the first one. But we can effortlessly make it shorter by chaining methods. In fact, since we were returning -1 just to signal that the underlying operation failed, we are better off returning a Result object upstream. This will allow us to compose operations on top of getServerUptime() just like we did with connect().
Creating Results
How to instantiate new Result objects
There are several ways to create result objects.
Successful Results
A successful result contains a non-null value produced by an operation when everything works as intended. We can use Results::success to create a new instance.
@Test
void testSuccess() {
  // When
  Result<Integer, ?> result = Results.success(200);
  // Then
  assertTrue(result::hasSuccess);
  assertFalse(result::hasFailure);
}
Note that we can invoke or to check whether a result is successful or failed (more on this in the ).
Failed Results
On the other hand, a failed result holds a value representing the problem that prevented the operation from completing. We can use Results::failure to create a new one.
@Test
void testFailure() {
  // When
  Result<?, String> result = Results.failure("The operation failed");
  // Then
  assertTrue(result::hasFailure);
  assertFalse(result::hasSuccess);
}
Failure values cannot be null either.
Results Based on Nullable Values
When we need to create results that depend on a possibly null value, we can use Results::ofNullable. If the first argument is null, then the second one will be used to create a failed result.
@Test
void testOfNullable() {
  // Given
  String string1 = "The operation succeeded";
  String string2 = null;
  // When
  Result<String, Integer> result1 = Results.ofNullable(string1, 404);
  Result<String, Integer> result2 = Results.ofNullable(string2, 404);
  // Then
  assertTrue(result1::hasSuccess);
  assertTrue(result2::hasFailure);
}
The second argument can be either a failure value or a function that produces a failure value.
Results Based on Optionals
We can also use Results::ofOptional to create results that depend on an Optional value. If the first argument is an empty optional, then the second one will be used to create a failed result.
Finally, if we have a task that may either return a success value or throw an exception, we can encapsulate it as a result using so we don't need to use a try-catch block.
We've covered how to create new instances of Result using various factory methods provided by the Results class. Each method serves a specific purpose, allowing you to select the most suitable one based on the situation.
Introduction
A Java library to handle success and failure without exceptions
Wave goodbye to slow exceptions and embrace clean, efficient error handling by encapsulating operations that may succeed or fail in a type-safe way.
Optional is great for values that may be present or absent, but it does not explain why something is missing. Result fills that gap by carrying either a successful value or a failure reason, so your code can describe what happened instead of hiding it.
1
Recap
Level up and lessons learned
Congratulations on reaching the end of this guide! By now, you should have a solid understanding of how to use results in your Java applications effectively. Here's a brief recap of what you've learned:
Getting Started: You learned how to integrate result objects into your codebase and instantiate new ones.
Basic Usage: You explored foundational operations like checking statuses, unwrapping values, and executing conditional actions based on result status, enabling you to respond dynamically to success and failure scenarios.
Advanced Usage
How to take Result objects to the next level
While understanding the basics provides a solid foundation, the true potential of result objects is unlocked through their functional capabilities. Mastering these techniques enables concise and readable error handling by leveraging the power of .
This section will guide you through these powerful tools, demonstrating how to manipulate results effectively so you can craft more robust and maintainable Java applications.
Basic Usage
How to solve simple use-case scenarios
In this section, we'll cover foundational use cases, including checking the status of a result, unwrapping the value inside a result, and taking different actions based on success or failure.
These basics will help you handle errors more cleanly and efficiently without cluttering your code with try-catch blocks.
The most idiomatic approach to handling results involves screening them and applying various mapping and flat-mapping methods to transform and compose behavior.
How to find out if the operation succeded or failed
As we discovered earlier, we can easily determine if a given Result instance is successful or not.
Checking Success
We can use Result::hasSuccess to obtain a boolean value that represents whether a result is successful.
Checking Failure
We can also use Result::hasFailure to find out if a result contains a failure value.
Conclusion
We discussed how to determine the state of a Result object using hasSuccess and hasFailure. These methods provide a straightforward way to identify the outcome of an operation, helping you make decisions based on the outcome.
Conventional wisdom says exceptional logic shouldn't be used for normal program flow. Results make us deal with expected error situations explicitly to enforce good practices and make our programs run faster.
Result objects are immutable, providing thread safety without the need for synchronization. This makes them ideal for multi-threaded applications, ensuring predictability and eliminating side effects.
Using Exceptions
Using Results
Embracing Results
Create a result from an operation
2
Inspect whether it succeeded or failed
result.ifFailure(error -> logger.error("Couldn't get user: {}", id, error));
3
Transform it if needed, then unwrap it as required
String name = result.mapSuccess(User::name).orElse("Anonymous");
Not a fan of reading long docs? No worries! Tune in to Deep Dive, a podcast generated by NetbookLM. In just a few minutes, you'll get the essential details and a fun intro to what this library can do for you!
Handle success and failure in Java without exceptions
Result is a Java library for modeling operation outcomes explicitly. It gives you a simpler, faster alternative to exception-driven flow when you want to represent both success and failure in a single, composable type.
Advanced Usage: You delved into more sophisticated techniques like screening results to transform successes and failures based on conditions, and leveraging mapping and flat-mapping methods to compose behaviors in a functional style.
Next, we'll introduce additional resources where you can further enhance your understanding and skills. Let's continue expanding your knowledge!
The full source code for the examples is .
Screening Results
How to reject success values and accept failure values
The following methods allow you to run inline tests on the wrapped value of a result to dynamically transform a success into a failure or a failure into a success.
The method allows you to transform a success into a failure based on certain conditions. It takes two parameters:
A to determine if the success value is acceptable.
A mapping that will produce a failure value if the value is deemed unacceptable.
Demo Projects
Check out some REST APIs that consume and produce Result objects
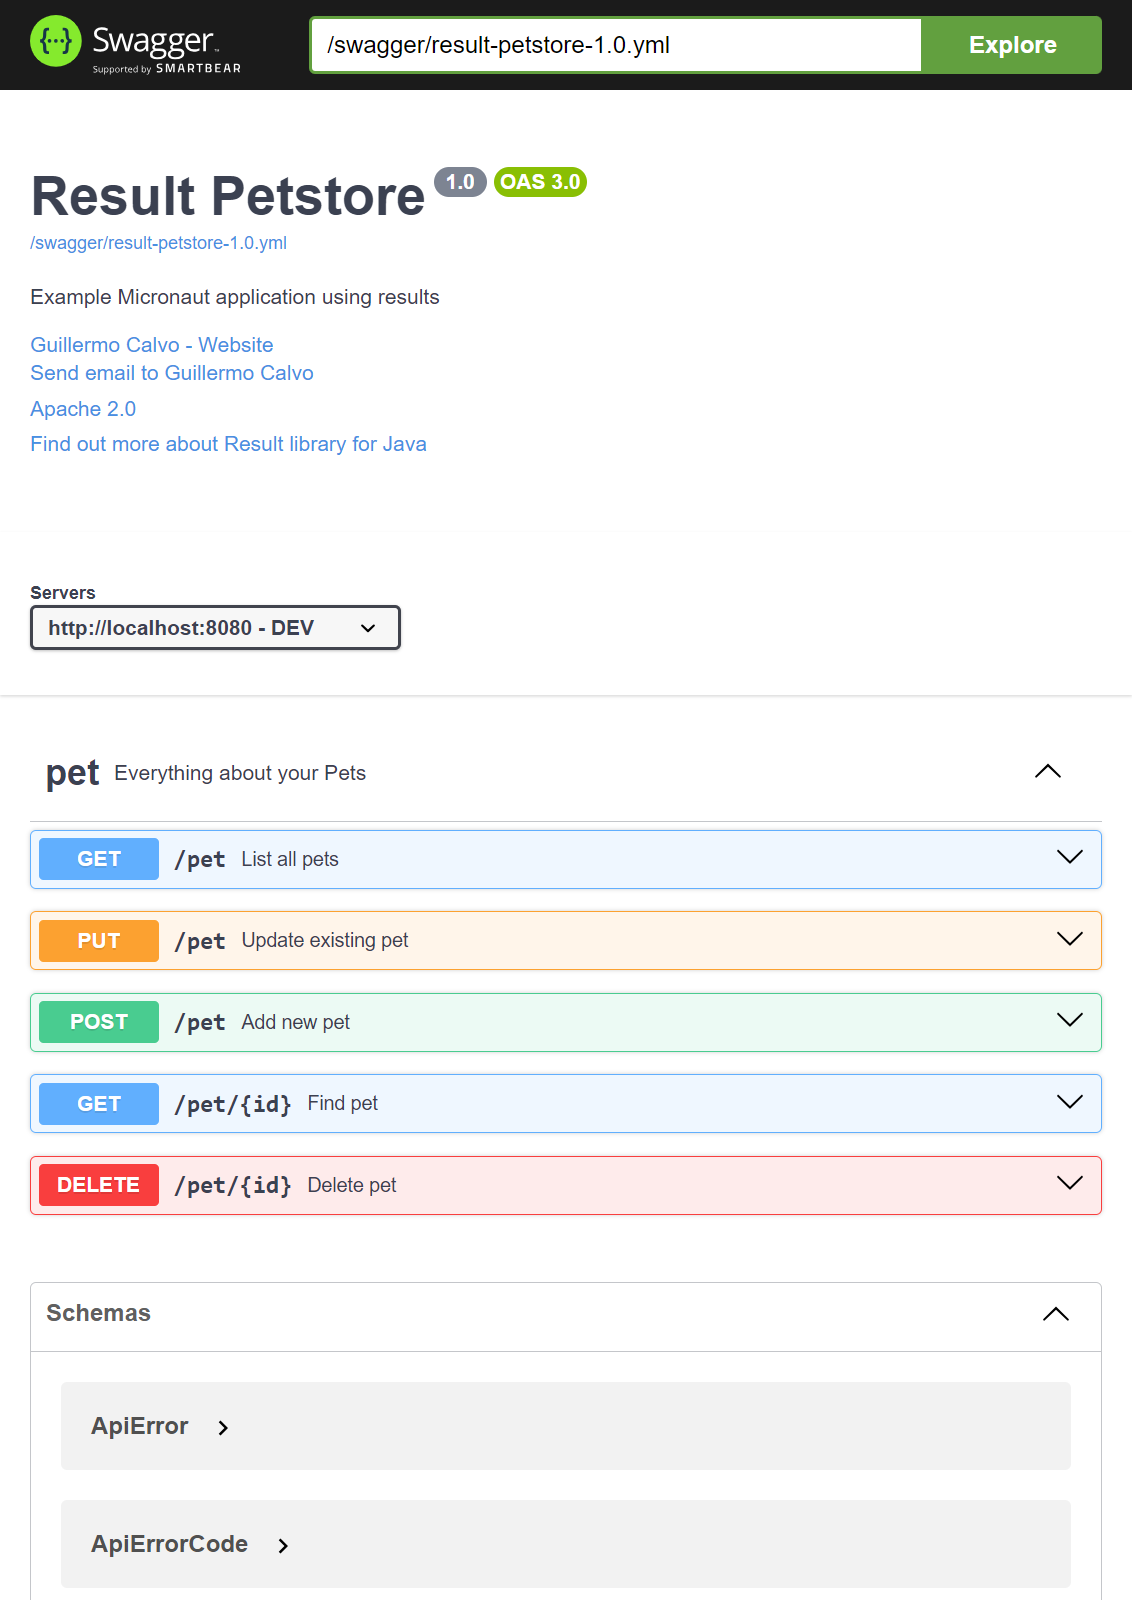
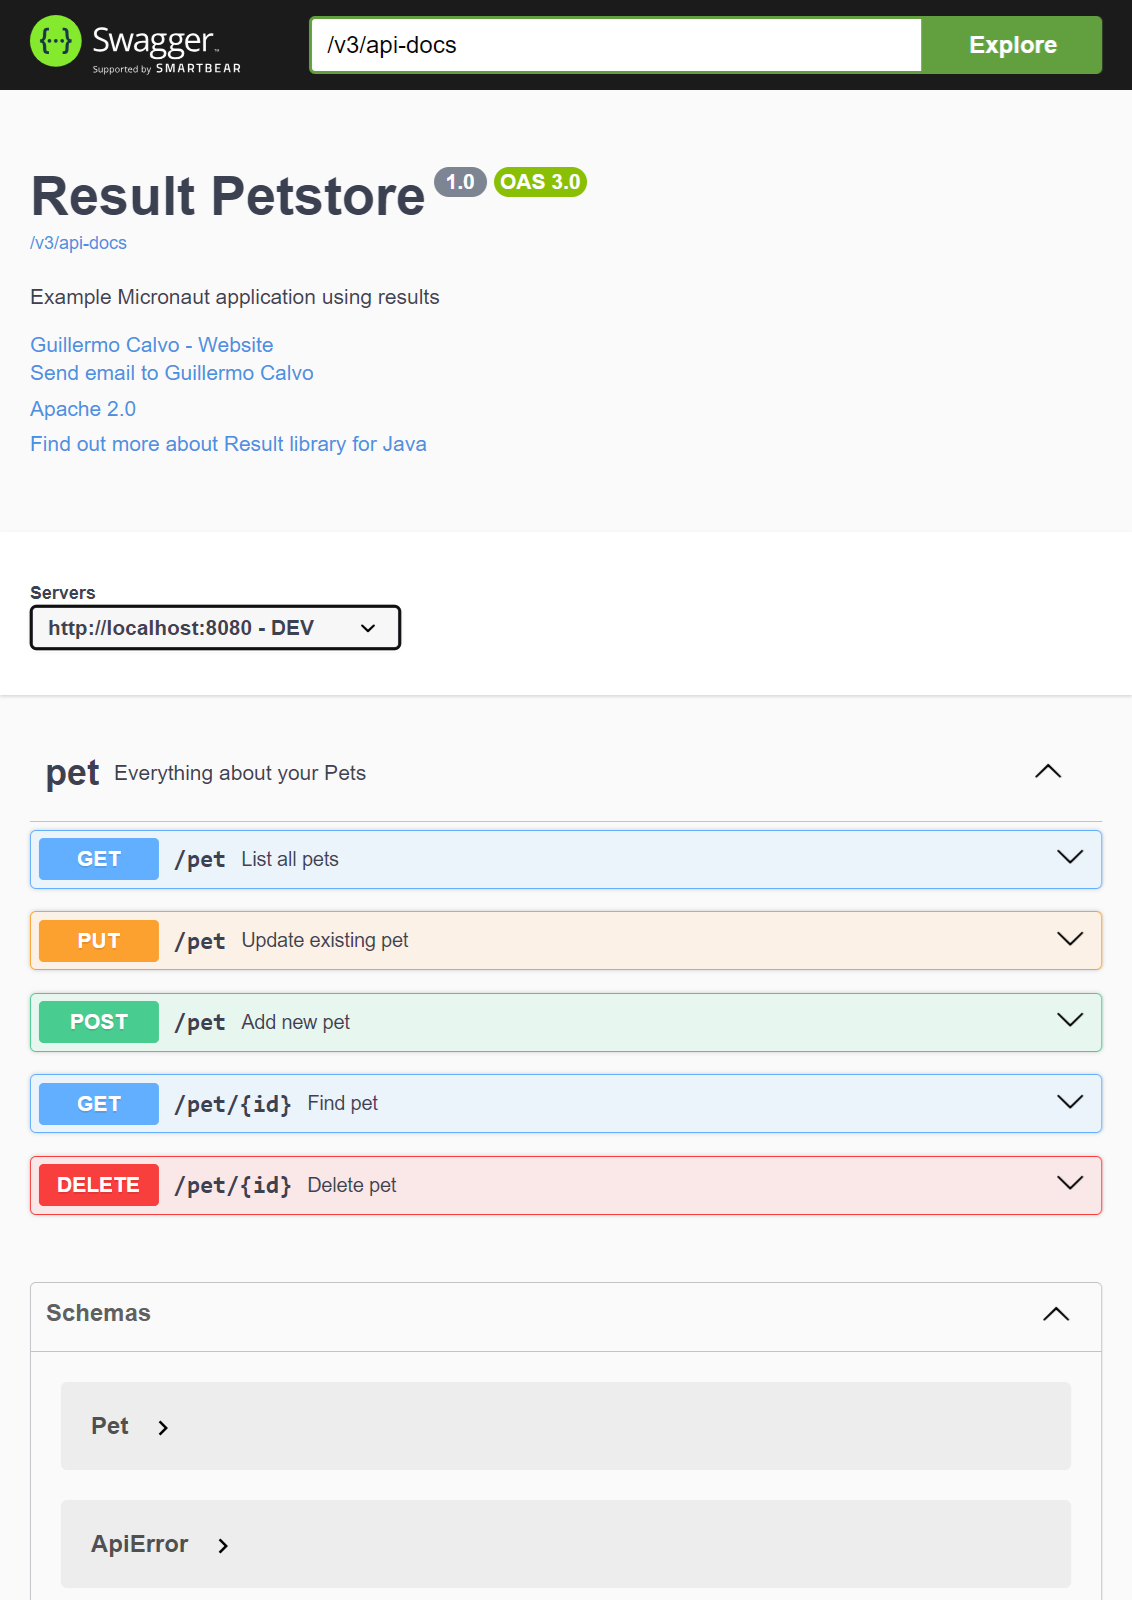
To help you become familiar with this library, you can explore two demo projects that showcase how to handle and serialize Result objects within popular frameworks like and . Each project provides a working example of a "pet store" web service that exposes a REST API for managing pets. They are based on and you can interact with them using .
These projects illustrate how to develop powerful APIs using Result objects. Follow the examples to create resilient web services that elegantly handle success and failure scenarios.
Ecosystem
Boosting results with enhanced capabilities
Add-ons are optional, yet powerful extensions to the Result library, designed to provide extra features that can be integrated on demand.
These small, focused libraries provide a modular approach to extending the core functionalities of Results without adding unnecessary complexity.
In this example, we use a lambda expression to validate that the success value inside result is even. Since the number is odd, it transforms the result into a failure.
The Result::recover method allows you to transform a failure into a success based on certain conditions. It also receives two parameters:
A Predicate to determine if the failure value is recoverable.
A mapping Function that will produce a success value from the acceptable failure value.
In this example, we use method references to check if the failure value equals OK and then transform the result into a success.
We covered how to filter out unwanted success values and accept failure values using filter and recover. These methods enable you to refine results based on specific criteria, ensuring that only the relevant values are processed down the line.
Screening mechanisms provide greater flexibility in handling edge cases and enable more robust error recovery strategies.
Validating Success
This can be used to enforce additional validation constraints on success values.
is a widely-used, JVM-based framework designed to simplify the development of stand-alone, production-ready Spring applications. It emphasizes convention over configuration, allowing developers to get started quickly with minimal setup and leveraging the powerful while minimizing boilerplate code.
is a modern, JVM-based framework for building lightweight microservices and serverless applications. It focuses on fast startup times and low memory usage. Although not as widely adopted as , it has gained popularity for its performance and innovative features.
Write expressive assertions using
Serialize and deserialize results using
Serialize and deserialize results using
Benchmarks
Measuring performance to find out how fast Results are
Throughout these guides, we have mentioned that throwing Java exceptions is slow. But... how slow? According to our benchmarks, throwing an exception is several orders of magnitude slower than returning a failed result.
Returning a failed Result object is significantly faster than throwing an exception.
This proves that using exceptional logic just to control normal program flow is a bad idea.
We should throw exceptions sparingly, even more so when developing performance-critical applications.
The first scenarios compare the most basic usage: a method that returns a String or fails, depending on a given int parameter:
Using Exceptions
public String usingExceptions(int number) throws SimpleException {
  if (number < 0) {
    throw new SimpleException(number);
  }
  return "ok";
}
Using Results
public Result<String, SimpleFailure> usingResults(int number) {
  if (number < 0) {
    return Results.failure(new SimpleFailure(number));
  }
  return Results.success("ok");
}
Complex Scenarios
The next scenarios do something a little bit more elaborate: a method invokes the previous method to retrieve a String; if successful, then converts it to upper case; otherwise transforms the "simple" error into a "complex" error.
We provided insights into the Result library's performance through benchmarking. While our metrics corroborate that most codebases could benefit from using this library instead of throwing exceptions, its main goal is to help promote best practices and implement proper error handling.
Fluent Assertions
How to assert Result objects fluently
You can use fluent assertions for Result objects to enhance the readability and expressiveness of your unit tests. These assertions are based on AssertJ, an open-source Java library that offers a fluent API for writing assertions in test cases.
features a comprehensive and intuitive set of strongly-typed assertions for unit testing. It is a popular choice among Java developers due to its effective features and compatibility with various testing frameworks like and .
How to Use this Add-On
Add this Maven dependency to your build:
Group ID
Artifact ID
Latest Version
com.leakyabstractions
You can use in your tests to create fluent assertions for result objects.
If, for any reason, you cannot statically import assertThat, you can use instead.
We covered how to use fluent assertions for Results. This approach allows you to write clear and expressive tests, enhancing the maintainability of your unit tests while ensuring that Result objects behave as expected.
License
Feel free to tweak and share — no strings attached
This library is licensed under the Apache License, Version 2.0 (the "License"); you may not use it except in compliance with the License.
Unless required by applicable law or agreed to in writing, software distributed under the License is distributed on an "AS IS" BASIS, WITHOUT WARRANTIES OR CONDITIONS OF ANY KIND, either express or implied.
See the License for the specific language governing permissions and limitations under the License.
Permitted
Commercial Use: You may use this library and derivatives for commercial purposes.
Modification: You may modify this library.
Required
License and Copyright Notice: If you distribute this library you must include a copy of the license and copyright notice.
State Changes: If you modify and distribute this library you must document changes made to this library.
Forbidden
Trademark use: This license does not grant any trademark rights.
Liability: The library author cannot be held liable for damages.
Micronaut Demo Project
Take a look at a Micronaut-based REST API leveraging Result objects
This demo project demonstrates how to handle and serialize Result objects within a application. It provides a working example of a "pet store" web service that exposes a REST API for managing pets.
The project was generated via including features: annotation-api, http-client, openapi, serialization-jackson, swagger-ui, toml, and validation.
Then was manually added as a dependency to serialize and deserialize Result objects.
That's all we need to do to make Micronaut treat results as .
Bill of Materials
How to declare dependencies without having to worry about version numbers
Tracking multiple add-on versions for your project can quickly become cumbersome. In that situation, you can use the convenient to centralize and align their versions. This ensures compatibility and simplifies dependency maintenance.
The basic idea is that instead of specifying a version number for each Result library in your project, you can use this BOM to get a complete set of consistent versions.
Add this Maven dependency to your build:
Group ID
Artifact ID
Latest Version
Conditional Actions
How to handle success and failure scenarios
We'll now delve into a set of methods that allow you to take conditional actions based on the state of a result. They provide a cleaner and more expressive way to handle success and failure scenarios, eliminating the need for lengthy if/else blocks.
We can use to specify an action that must be executed if the result represents a successful outcome. This method takes a that will be applied to the success value wrapped by the result.
In this example, ifSuccess ensures that the provided action (adding the success value to the list) is only executed if the parsing operation is successful.
On the other hand, we can use method to define an action that must be taken when the result represents a failure. This method also takes a that will be applied to the failure value inside the result.
Here, ifFailure
Distribution: You may distribute this library.
Patent Use: This license provides an express grant of patent rights from contributors.
Private Use: You may use and modify this library without distributing it.
Warranty: This library is provided without any warranty.
ensures that the provided action (adding the failure value to the list) is only executed if the parsing operation fails.
Finally, Result::ifSuccessOrElse allows you to specify two separate actions: one for when the operation succeeded and another for when it failed. This method takes two consumer functions: the first for handling the success case and the second for handling the failure case.
In this example, ifSuccessOrElse simplifies conditional logic by providing a single method to handle both success and failure scenarios, making the code more concise and readable.
We explained how to handle success and failure scenarios using these three methods. They provide a powerful way to perform conditional actions based on the state of a Result, streamlining your error handling and making your code more readable and maintainable.
@Test
void testIfSuccess() {
  // Given
  List<Object> list = new ArrayList<>();
  Result<Integer, String> result = success(100);
  // When
  result.ifSuccess(list::add);
  // Then
  assertEquals(100, list.getFirst());
}
@Test
void testIfFailure() {
  // Given
  List<Object> list = new ArrayList<>();
  Result<Integer, String> result = failure("ERROR");
  // When
  result.ifFailure(list::add);
  // Then
  assertEquals("ERROR", list.getFirst());
}
@Test
void testIfSuccessOrElse() {
  // Given
  List<Object> list1 = new ArrayList<>();
  List<Object> list2 = new ArrayList<>();
  Result<Long, String> result1 = success(100L);
  Result<Long, String> result2 = failure("ERROR");
  // When
  result1.ifSuccessOrElse(list1::add, list1::add);
  result2.ifSuccessOrElse(list2::add, list2::add);
  // Then
  assertEquals(100L, list1.getFirst());
  assertEquals("ERROR", list2.getFirst());
}
API responses contain a Result field, encapsulating the outcome of the requested operation.
Results have different success types, depending on the specific endpoint. Failures will be encapsulated as instances of ApiError.
Controllers return instances of ApiResponse that will be serialized to JSON by Micronaut:
Since failures are expressed as ApiError objects, endpoints invariably return HTTP status 200.
The application can be built and run with Gradle.
This will start a stand-alone server on port 8080.
We discussed the benefits of using the Bill of Materials for managing dependencies in your project. With the BOM, you can eliminate the hassle of manually specifying version numbers, ensuring consistency and compatibility across all Result libraries.
Maven's Bill of Materials POMs are special POM files that group dependency versions known to be valid and tested to work together, reducing the chances of having version mismatches.
To address performance concerns, benchmark your applications to gain reusable insights. These should guide your decisions on selecting frameworks and libraries.
result-assertj
import static com.leakyabstractions.result.assertj.ResultAssertions.assertThat;

@Test
void testAssertThat() {
  // Given
  final int zero = 0;
  // When
  final Result<Integer, String> result = success(zero);
  // Then
  assertThat(zero).isZero();
  assertThat(result).hasSuccess(zero);
}
import static com.leakyabstractions.result.assertj.ResultAssert.assertThatResult;
import static org.assertj.core.api.Assertions.assertThat;

@Test
void testAssertThatResult() {
  // Given
  final int zero = 0;
  // When
  final Result<Integer, String> result = success(zero);
  // Then
  assertThat(zero).isZero();
  assertThatResult(result).hasSuccess(zero);
}
Maven Central provides snippets for different build tools to declare this dependency.
Take a look at a Spring Boot-based REST API leveraging Result objects
This demo project demonstrates how to handle and serialize Result objects within a Spring Boot application. It provides a working example of a "pet store" web service that exposes a REST API for managing pets.
Generating the Project
The project was generated via Spring Initializr including features: web and cloud-feign.
@Configuration
public class JacksonConfig {
  @Bean
  public Module registerResultModule() {
    return new ResultModule();
  }
}
API Responses
API responses contain a Result field, encapsulating the outcome of the requested operation.
Results have different success types, depending on the specific endpoint. Failures will be encapsulated as instances of ApiError.
Controllers return instances of ApiResponse that will be serialized to JSON by Spring Boot.
Since failures are expressed as ApiError objects, endpoints invariably return HTTP status 200.
The application can be built and run with Gradle.
This will start a stand-alone server on port 8080.
Once started, you can interact with the API.
You should see a JSON response like this:
You can navigate to to inspect the API using an interactive UI
Unwrapping Values
How to get values out of Result objects
In essence, a Result object is just a container that wraps a success or a failure value for us. Therefore, sometimes you are going to want to get that value out of the container.
The most basic way to retrieve the success value wrapped inside a result is by using . This method will return an optional success value, depending on whether the result was actually successful or not.
Similarly, we can use to obtain the failure value held by a Result object.
We can use to provide an alternative success value that must be returned when the result is unsuccessful.
The method is similar to , but it takes a mapping instead of a
. The function will receive the failure value to produce the alternative success value.
We explored various ways to retrieve values from results. Using these methods you can efficiently access the underlying data within a Result object, whether it's a success or a failure.
As useful as this may seem, we will soon realize that we won't be doing it very often.
Unwrapping Success
Unwrapping Failure
Unlike Optional::get, these methods are null-safe. However, in practice, we will not be using them frequently. Especially, since there are more convenient ways to get the success value out of a result.
How to serialize Result objects with Jackson 2.x and 3.x
When using Result objects with we might run into some problems. The Jackson datatype modules for Result solve them by making Jackson treat results as if they were ordinary objects.
Choose the Maven dependency that matches your Jackson version.
Add this Maven dependency to your build:
Group ID
Artifact ID
Latest Version
Transforming Results
How to transform values wrapped inside Results
Transforming result objects is a key feature that enables you to compose complex operations in a clean and functional style. There are two primary techniques used for these transformations.
Mapping involves applying a function to the value inside a result to produce a new result object.
We can use to apply a function to the success value of a result, transforming it into a new success value. If the result is a failure, it remains unchanged.
In this example, we wrap a String inside a Result object and invoke mapSuccess to calculate its length and wrap it inside a new Result object.
Next up, we can use Result::mapFailure to apply a function to the failure value, transforming it into a new one. If the result is a success, it remains unchanged.
Here, we invoke mapFailure to transform the failure type of the result from String to Boolean for demonstration purposes.
The Result::map method simultaneously handles both success and failure cases by applying two separate functions: one for transforming the success value and one for transforming the failure value.
Flat-mapping is used to chain operations that return results themselves, flattening the nested structures into a single result object. This allows you to transform a success into a failure, or a failure into a success.
To illustrate flat-mapping concepts, the next examples will follow a familiar "pet store" theme. This involves three Java types: Pet, PetError, and PetStore. These types will help us demonstrate the effective use of flat-mapping methods.
With these types defined, we'll explore how to use various flat-mapping methods to transform result objects and manage pet-related operations in our imaginary pet store.
Use Result::flatMapSuccess to chain an operation that returns a result object. This method applies a mapping function to the success value, replacing the original result with the new one returned by the function. If the result is a failure, it remains unchanged.
This example starts with a successful result containing a wrong pet ID (not found in the pet store). When we flat-map it with the store's find method reference, the final result contains a pet error.
Use Result::flatMapFailure to chain a result-bearing operation. This method also replaces the original result with the new one returned by the mapping function. If the result is a success, it remains unchanged.
Here we start with a failed result containing a pet error. When we flat-map it with the store's getDefaultPetId method reference, the final result contains the ID of the default pet in the store.
The Result::flatMap method handles both success and failure cases by applying the appropriate function based on the status of the original result.
This example starts with a successful result containing a wrong pet ID (not found in the pet store). When we flat-map it with the store's find method reference, the final result contains a pet error.
Here we start with a failed result containing a pet error. When we flat-map it with the store's getDefaultPetId method reference, the final result contains the ID of the default pet in the store.
We demonstrated how to transform results in a concise and functional manner, enhancing the clarity and flexibility of your error-handling and data-processing logic.
enum PetError {NOT_FOUND, NO_CONFIG}

record Pet(long id, String name) {

  static final Pet DEFAULT = new Pet(0, "Default pet");
  static final Pet ROCKY = new Pet(1, "Rocky");
  static final Pet GARFIELD = new Pet(2, "Garfield");
}

record PetStore(Pet... pets) {

  PetStore() {
    this(Pet.ROCKY, Pet.GARFIELD);
  }

  Result<Pet, PetError> find(long id) {
    Optional<Pet> found = stream(pets).filter(pet -> pet.id() == id).findAny();
    return Results.ofOptional(found, NOT_FOUND);
  }

  Result<Pet, PetError> getDefaultPet(PetError error) {
    return error == NO_CONFIG ? success(Pet.DEFAULT) : failure(error);
  }

  Result<Long, PetError> getDefaultPetId(PetError error) {
    return getDefaultPet(error).mapSuccess(Pet::id);
  }
}
@Test
void testFlatMapSuccess() {
  // Given
  PetStore store = new PetStore();
  Result<Long, PetError> result = success(100L);
  // When
  Result<Pet, PetError> mapped = result.flatMapSuccess(store::find);
  // Then
  assertEquals(NOT_FOUND, mapped.getFailure().orElse(null));
}
@Test
void testFlatMapFailure() {
  // Given
  PetStore store = new PetStore();
  Result<Long, PetError> result = failure(NO_CONFIG);
  // When
  Result<Long, PetError> mapped = result.flatMapFailure(store::getDefaultPetId);
  // Then
  assertEquals(Pet.DEFAULT.id(), mapped.orElse(null));
}
@Test
void testFlatMap() {
  // Given
  PetStore store = new PetStore();
  Result<Long, PetError> result1 = success(100L);
  Result<Long, PetError> result2 = failure(NO_CONFIG);
  // When
  Result<Pet, PetError> mapped1 = result1.flatMap(store::find, store::getDefaultPet);
  Result<Pet, PetError> mapped2 = result2.flatMap(store::find, store::getDefaultPet);
  // Then
  assertEquals(NOT_FOUND, mapped1.getFailure().orElse(null));
  assertEquals(Pet.DEFAULT, mapped2.orElse(null));
}
com.leakyabstractions
result-jackson
Add this one instead:
Group ID
Artifact ID
Latest Version
com.leakyabstractions
result-jackson3
Let's start by creating a class ApiResponse containing one ordinary and one Result field.
Then we will take a look at what happens when we try to serialize and deserialize ApiResponse objects.
Now, let's instantiate an ApiResponse object.
And finally, let's try serializing it using an object mapper.
Then, all we need to do is register ResultModule with our object mapper.
Alternatively, you can also make Jackson 2.x auto-discover the module.
Just like the previous example, we need to add ResultModule to our JSON mapper.
Or simply use auto-discovery:
Now, let's try and serialize our ApiResponse object again:
If we look at the serialized response, we'll see that this time the result field contains a null failure value and a non-null success value:
Next, we can try serializing a failed result.
We can verify that the serialized response contains a non-null failure value and a null success value.
Now, let's repeat our tests for deserialization. If we read our ApiResponse again, we'll see that we no longer get an InvalidDefinitionException.
Finally, let's repeat the test again, this time with a failed result. We'll see that yet again we don't get an exception, and in fact, have a failed result.
We learned how to serialize and deserialize Result objects using both Jackson 2.x and Jackson 2.x, demonstrating how the provided datatype module enables Jackson to treat Results as ordinary objects.
The integration is nearly identical across versions; the main differences are limited to dependency coordinates and how the object mapper is constructed and configured.
Jackson is a Java library for JSON parsing and generation. It is widely used for converting Java objects to JSON and vice versa, making it essential for handling data in web services and RESTful APIs.
/** Represents an API response */
public class ApiResponse {

  @JsonProperty
  String version;

  @JsonProperty
  Result<String, String> result;

  // Constructors, getters and setters omitted
}
ApiResponse response = new ApiResponse();
response.setVersion("v1");
response.setResult(success("Perfect"));
ObjectMapper objectMapper = new ObjectMapper();
String json = objectMapper.writeValueAsString(response);
Java 8 optional type `java.util.Optional<java.lang.String>`
 not supported by default:
 add Module "com.fasterxml.jackson.datatype:jackson-datatype-jdk8"
 to enable handling
Cannot construct instance of `com.leakyabstractions.result.api.Result`
 (no Creators, like default constructor, exist):
 abstract types either need to be mapped to concrete types,
 have custom deserializer, or contain additional type information
ObjectMapper objectMapper = new ObjectMapper();
objectMapper.registerModule(new ResultModule());
@Test
void deserializeSuccessfulResult() {
  // Given
  String json = "{\"version\":\"v5\",\"result\":{\"success\":\"Yay\"}}";
  // When
  ObjectMapper objectMapper = new ObjectMapper().findAndRegisterModules();
  ApiResponse response = objectMapper.readValue(json, ApiResponse.class);
  // Then
  assertEquals("v5", response.getVersion());
  assertEquals("Yay", response.getResult().orElse(null));
}
@Test
void deserializeFailedResult() {
  // Given
  String json = "{\"version\":\"v6\",\"result\":{\"failure\":\"Nay\"}}";
  // When
  ObjectMapper objectMapper = new ObjectMapper().findAndRegisterModules();
  ApiResponse response = objectMapper.readValue(json, ApiResponse.class);
  // Then
  assertEquals("v6", response.getVersion());
  assertEquals("Nay", response.getResult().getFailure().orElse(null));
}
Jackson 3.x
Maven Central provides snippets for different build tools to declare these dependencies.
Test Scenario
Problem Overview
Serialization Problem (Jackson 2.x Only)
Deserialization Problem (Both Jackson 2.x and 3.x)
Solution Implementation
Registering the Jackson Datatype Module for Result
Jackson 2.x
Jackson 3.x
Regardless of the chosen registration mechanism, once the appropriate dataype module is registered all functionality is available for all normal Jackson operations.
Serializing Results
Deserializing Results
Conclusion
The full source code for the examples is available on GitHub.
Lazy results optimize performance by deferring costly operations until absolutely necessary. They behave like regular results, but only execute the underlying operation when an actual check for success or failure is performed.
How to Use this Add-On
Add this Maven dependency to your build:
Group ID
Artifact ID
Latest Version
com.leakyabstractions
We can use to create a lazy result.
While can return a fixed success or failure, lazy results shine when they encapsulate time-consuming or resource-intensive operations.
This sample method simply increments and returns a counter for brevity. However, in a typical scenario, this would involve an I/O operation.
The advantage of lazy results is that they defer invoking the provided for as long as possible. Despite this, you can screen and transform them like any other result without losing their laziness.
In this example, the expensive calculation is omitted because the lazy result is never fully evaluated. This test demonstrates that a lazy result can be transformed while maintaining laziness, ensuring that the expensive calculation is deferred.
Finally, when it's time to check whether the operation succeeds or fails, the lazy result will execute it. This is triggered by using any of the terminal methods, such as .
Here, the expensive calculation is executed because the lazy result is finally evaluated.
By default, , , and are treated as terminal methods. This means they eagerly evaluate the result and then perform an action based on its status.
In this test, we don't explicitly unwrap the value or check the status, but since we want to consume the success value, we need to evaluate the lazy result first.
Furthermore, even if we wanted to handle the failure scenario, we would still need to evaluate the lazy result.
In this other test, we use instead of . Since the lazy result is evaluated to a success, the failure consumer is never executed.
When these conditional actions may also be skipped along with the expensive calculation, we can encapsulate them into a instead of a regular . All we need to do is to create the consumer using . Lazy consumers will preserve the laziness until a terminal method is eventually used on the result.
Here, we use a lazy consumer with so the expensive calculation is skipped because the lazy result is never fully evaluated.
We learned how to defer expensive calculations until absolutely necessary. By leveraging lazy results, you can optimize performance by avoiding unnecessary computations and only evaluating the operation's outcome when needed.
/* Represents the operation we may omit */
Result<Long, Exception> expensiveCalculation(AtomicLong timesExecuted) {
  long counter = timesExecuted.incrementAndGet();
  return success(counter);
}
@Test
void shouldSkipExpensiveCalculation() {
  AtomicLong timesExecuted = new AtomicLong();
  // Given
  Result<Long, Exception> lazy = LazyResults
      .ofSupplier(() -> expensiveCalculation(timesExecuted));
  // When
  Result<String, Exception> transformed = lazy.mapSuccess(Object::toString);
  // Then
  assertNotNull(transformed);
  assertEquals(0L, timesExecuted.get());
}
@Test
void shouldExecuteExpensiveCalculation() {
  AtomicLong timesExecuted = new AtomicLong();
  // Given
  Result<Long, Exception> lazy = LazyResults
      .ofSupplier(() -> expensiveCalculation(timesExecuted));
  // When
  Result<String, Exception> transformed = lazy.mapSuccess(Object::toString);
  boolean success = transformed.hasSuccess();
  // Then
  assertTrue(success);
  assertEquals(1L, timesExecuted.get());
}
@Test
void shouldHandleSuccessEagerly() {
  AtomicLong timesExecuted = new AtomicLong();
  AtomicLong consumerExecuted = new AtomicLong();
  Consumer<Long> consumer = x -> consumerExecuted.incrementAndGet();
  // Given
  Result<Long, Exception> lazy = LazyResults
      .ofSupplier(() -> expensiveCalculation(timesExecuted));
  // When
  lazy.ifSuccess(consumer);
  // Then
  assertEquals(1L, timesExecuted.get());
  assertEquals(1L, consumerExecuted.get());
}
@Test
void shouldHandleFailureEagerly() {
  AtomicLong timesExecuted = new AtomicLong();
  AtomicLong consumerExecuted = new AtomicLong();
  Consumer<Exception> consumer = x -> consumerExecuted.incrementAndGet();
  // Given
  Result<Long, Exception> lazy = LazyResults
      .ofSupplier(() -> expensiveCalculation(timesExecuted));
  // When
  lazy.ifFailure(consumer);
  // Then
  assertEquals(1L, timesExecuted.get());
  assertEquals(0L, consumerExecuted.get());
}
@Test
void shouldHandleSuccessLazily() {
  AtomicLong timesExecuted = new AtomicLong();
  AtomicLong consumerExecuted = new AtomicLong();
  Consumer<Long> consumer = LazyConsumer
      .of(x -> consumerExecuted.incrementAndGet());
  // Given
  Result<Long, Exception> lazy = LazyResults
      .ofSupplier(() -> expensiveCalculation(timesExecuted));
  // When
  lazy.ifSuccess(consumer);
  // Then
  assertEquals(0L, timesExecuted.get());
  assertEquals(0L, consumerExecuted.get());
}
Maven Central provides snippets for different build tools to declare this dependency.
When using Result objects with , we might run into some problems. The support for Result solves them by making Micronaut treat results as (so they can be serialized and deserialized).
Add this Maven dependency to your build:
Group ID
Artifact ID
Latest Version
Let's start by creating a record ApiOperation containing one ordinary and one Result field.
We will take a look at what happens when we try to serialize and deserialize ApiOperation objects with Micronaut.
Now, let's create a Micronaut controller that returns an instance of ApiOperation containing a successful result.
And finally, let's run the application and try the /operations/last endpoint we just created.
We'll see that we get a Micronaut CodecException caused by a SerdeException.
Although this may look strange, it's actually what we should expect. Even though we annotated ApiOperation as @Serdeable, Micronaut doesn't know how to serialize result objects yet, so the data structure cannot be serialized.
This is Micronaut's default serialization behavior. But we'd like to serialize the result field like this:
Now, let's reverse our previous example, this time trying to receive an ApiOperation as the body of a POST request.
This behavior again makes sense. Essentially, Micronaut cannot create new result objects, because Result is not annotated as @Introspected or @Serdeable.
What we want, is for Micronaut to treat Result values as JSON objects that contain either a success or a failure value. Fortunately, there's an easy way to solve this problem.
Now, let's try and serialize our ApiOperation object again.
If we look at the serialized response, we'll see that this time the result field contains a success field.
Next, we can try serializing a failed result.
We can verify that the serialized response contains a non-null failure value and a null success value:
Now, let's repeat our tests for deserialization. If we read our ApiOperation again, we'll see that we no longer get an IntrospectionException.
Finally, let's repeat the test again, this time with a failed result. We'll see that yet again we don't get an exception, and in fact, have a failed result.
We learned how to serialize and deserialize Result objects using Micronaut, demonstrating how the provided @SerdeImport enables Micronaut to treat Results as Serdeable objects.
com.leakyabstractions
Micronaut is a modern, JVM-based framework for building lightweight microservices and serverless applications. It focuses on fast startup times and low memory usage. Although not as widely adopted as Spring Boot, it has gained popularity for its performance and innovative features.
/** Represents an API operation */
@Serdeable
public record ApiOperation(String name, Result<String, String> result) {
}
@Controller("/operations")
public class ApiController {

    @Get("/last")
    ApiOperation lastOperation() {
        return new ApiOperation("setup", Results.success("Perfect"));
    }
}
curl 'http://localhost:8080/operations/last'
No serializable introspection present for type Success.
 Consider adding Serdeable. Serializable annotate to type Success.
 Alternatively if you are not in control of the project's source code,
 you can use @SerdeImport(Success.class) to enable serialization of this type.
@Test
void testSerializationProblem(ObjectMapper objectMapper) {
  // Given
  ApiOperation op = new ApiOperation("setup", success("Perfect"));
  // Then
  SerdeException error = assertThrows(SerdeException.class,
      () -> objectMapper.writeValueAsString(op));
  assertTrue(error.getMessage().startsWith(
      "No serializable introspection present for type Success."));
}
No bean introspection available for type
 [interface com.leakyabstractions.result.api.Result].
 Ensure the class is annotated with
 io.micronaut.core.annotation.Introspected
@Test
void testDeserializationProblem(ObjectMapper objectMapper) {
  // Given
  String json = """
      {"name":"renew","result":{"success":"OK"}}""";
  // Then
  IntrospectionException error = assertThrows(IntrospectionException.class,
      () -> objectMapper.readValue(json, ApiOperation.class));
  String errorMessage = error.getMessage(); // Extract error message
  // Verify error message
  assertTrue(errorMessage.startsWith("No bean introspection available " +
      "for type [interface com.leakyabstractions.result.api.Result]."));
} // End
@Test
void serializeSuccessfulResult(ObjectMapper objectMapper)
    throws IOException {
  // Given
  ApiOperation op = new ApiOperation("clean", success("All good"));
  // When
  String json = objectMapper.writeValueAsString(op);
  // Then
  assertEquals("""
      {"name":"clean","result":{"success":"All good"}}""", json);
}